


Whether they’re made in PowerPoint or Google Sheets, the best presentations dynamically engage with the audience through multimedia, meaning not just videos and static images but audio. And thanks to the power of AirDeck, it’s easy to do so! With voiceover narration — meaning a voice-over track that you can easily personalize and update, or any other form of audio — you can take any presentation to the next level. Here’s how to do it quickly and easily.
Related Post: How to Add Audio to PowerPoint
What is the voice over tool?
The voice over tool, one of many AirDeck features, allows you to narrate your slides or upload audio files from an external source. This is a quick and easy feature that makes your presentation much more engaging! You are able to personalize your presentation in just seconds.
Step-by-Step Instructions
- Click the record icon on the top task bar.
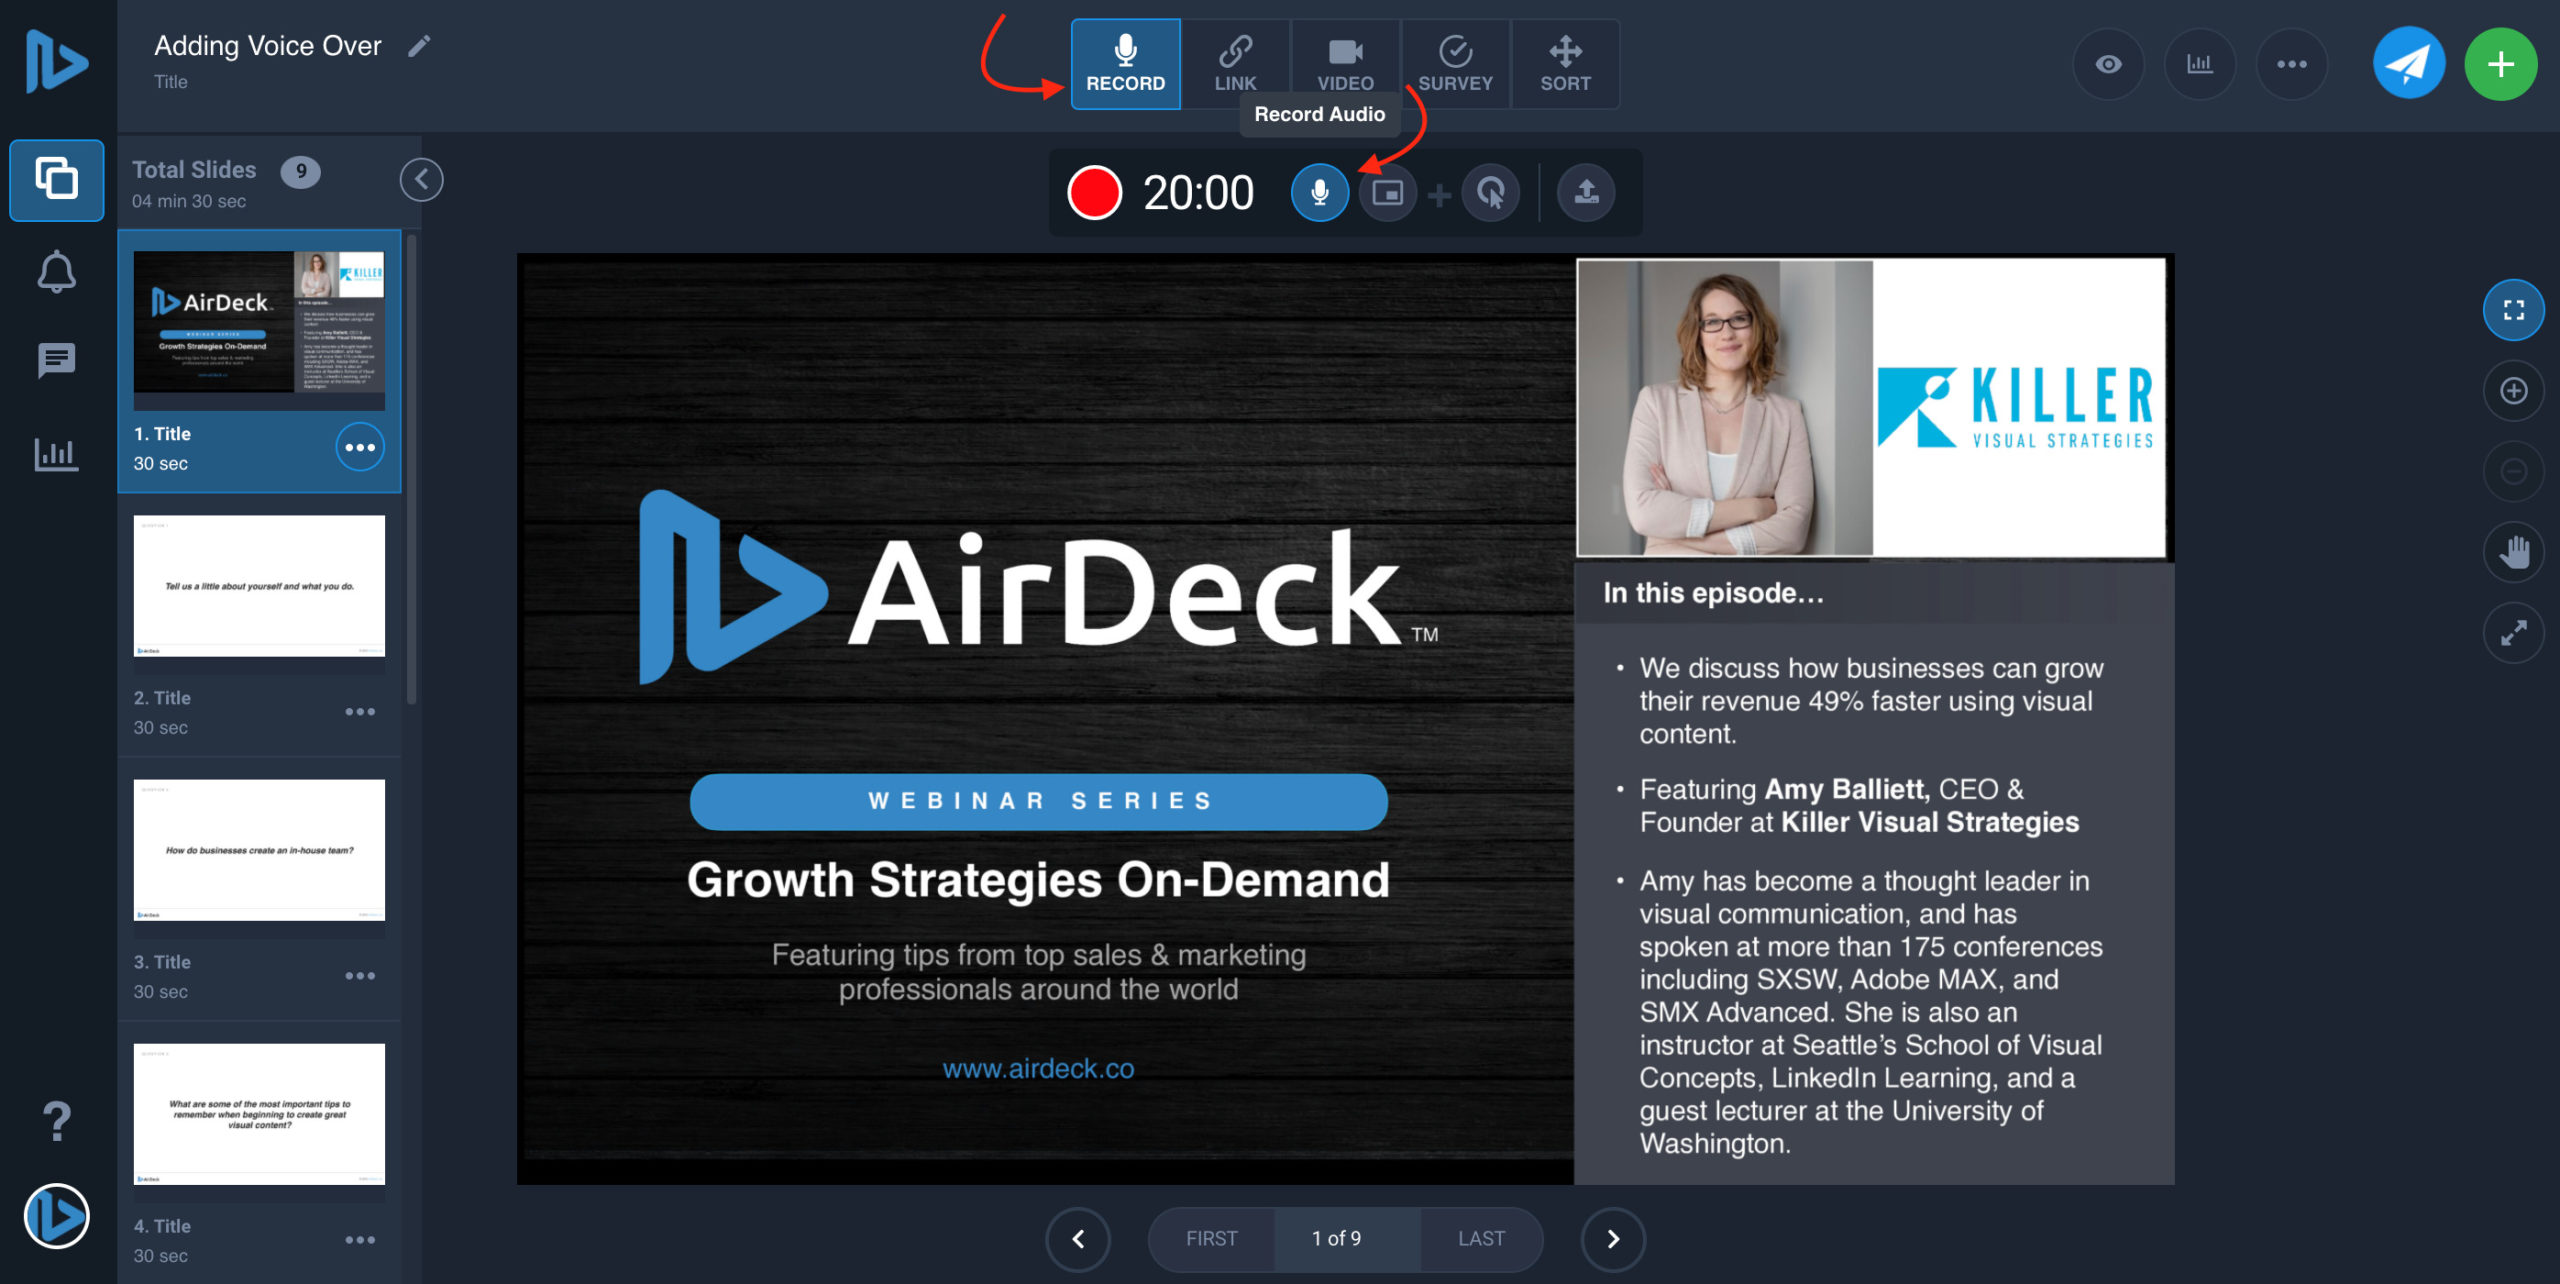
- Select which slide from your left hand “total slides” column you wish to add voice over.
- Use the red recording button on the top of the screen to record.
- Watch the countdown go “3, 2, 1, GO.”
- Start speaking when you see the pause sign. If you speak too soon, you will be cut off.
- Hit the stop button when you are finished speaking.
- Hit the save icon to save your voice over or hit the trash button to delete if you wish to start over.
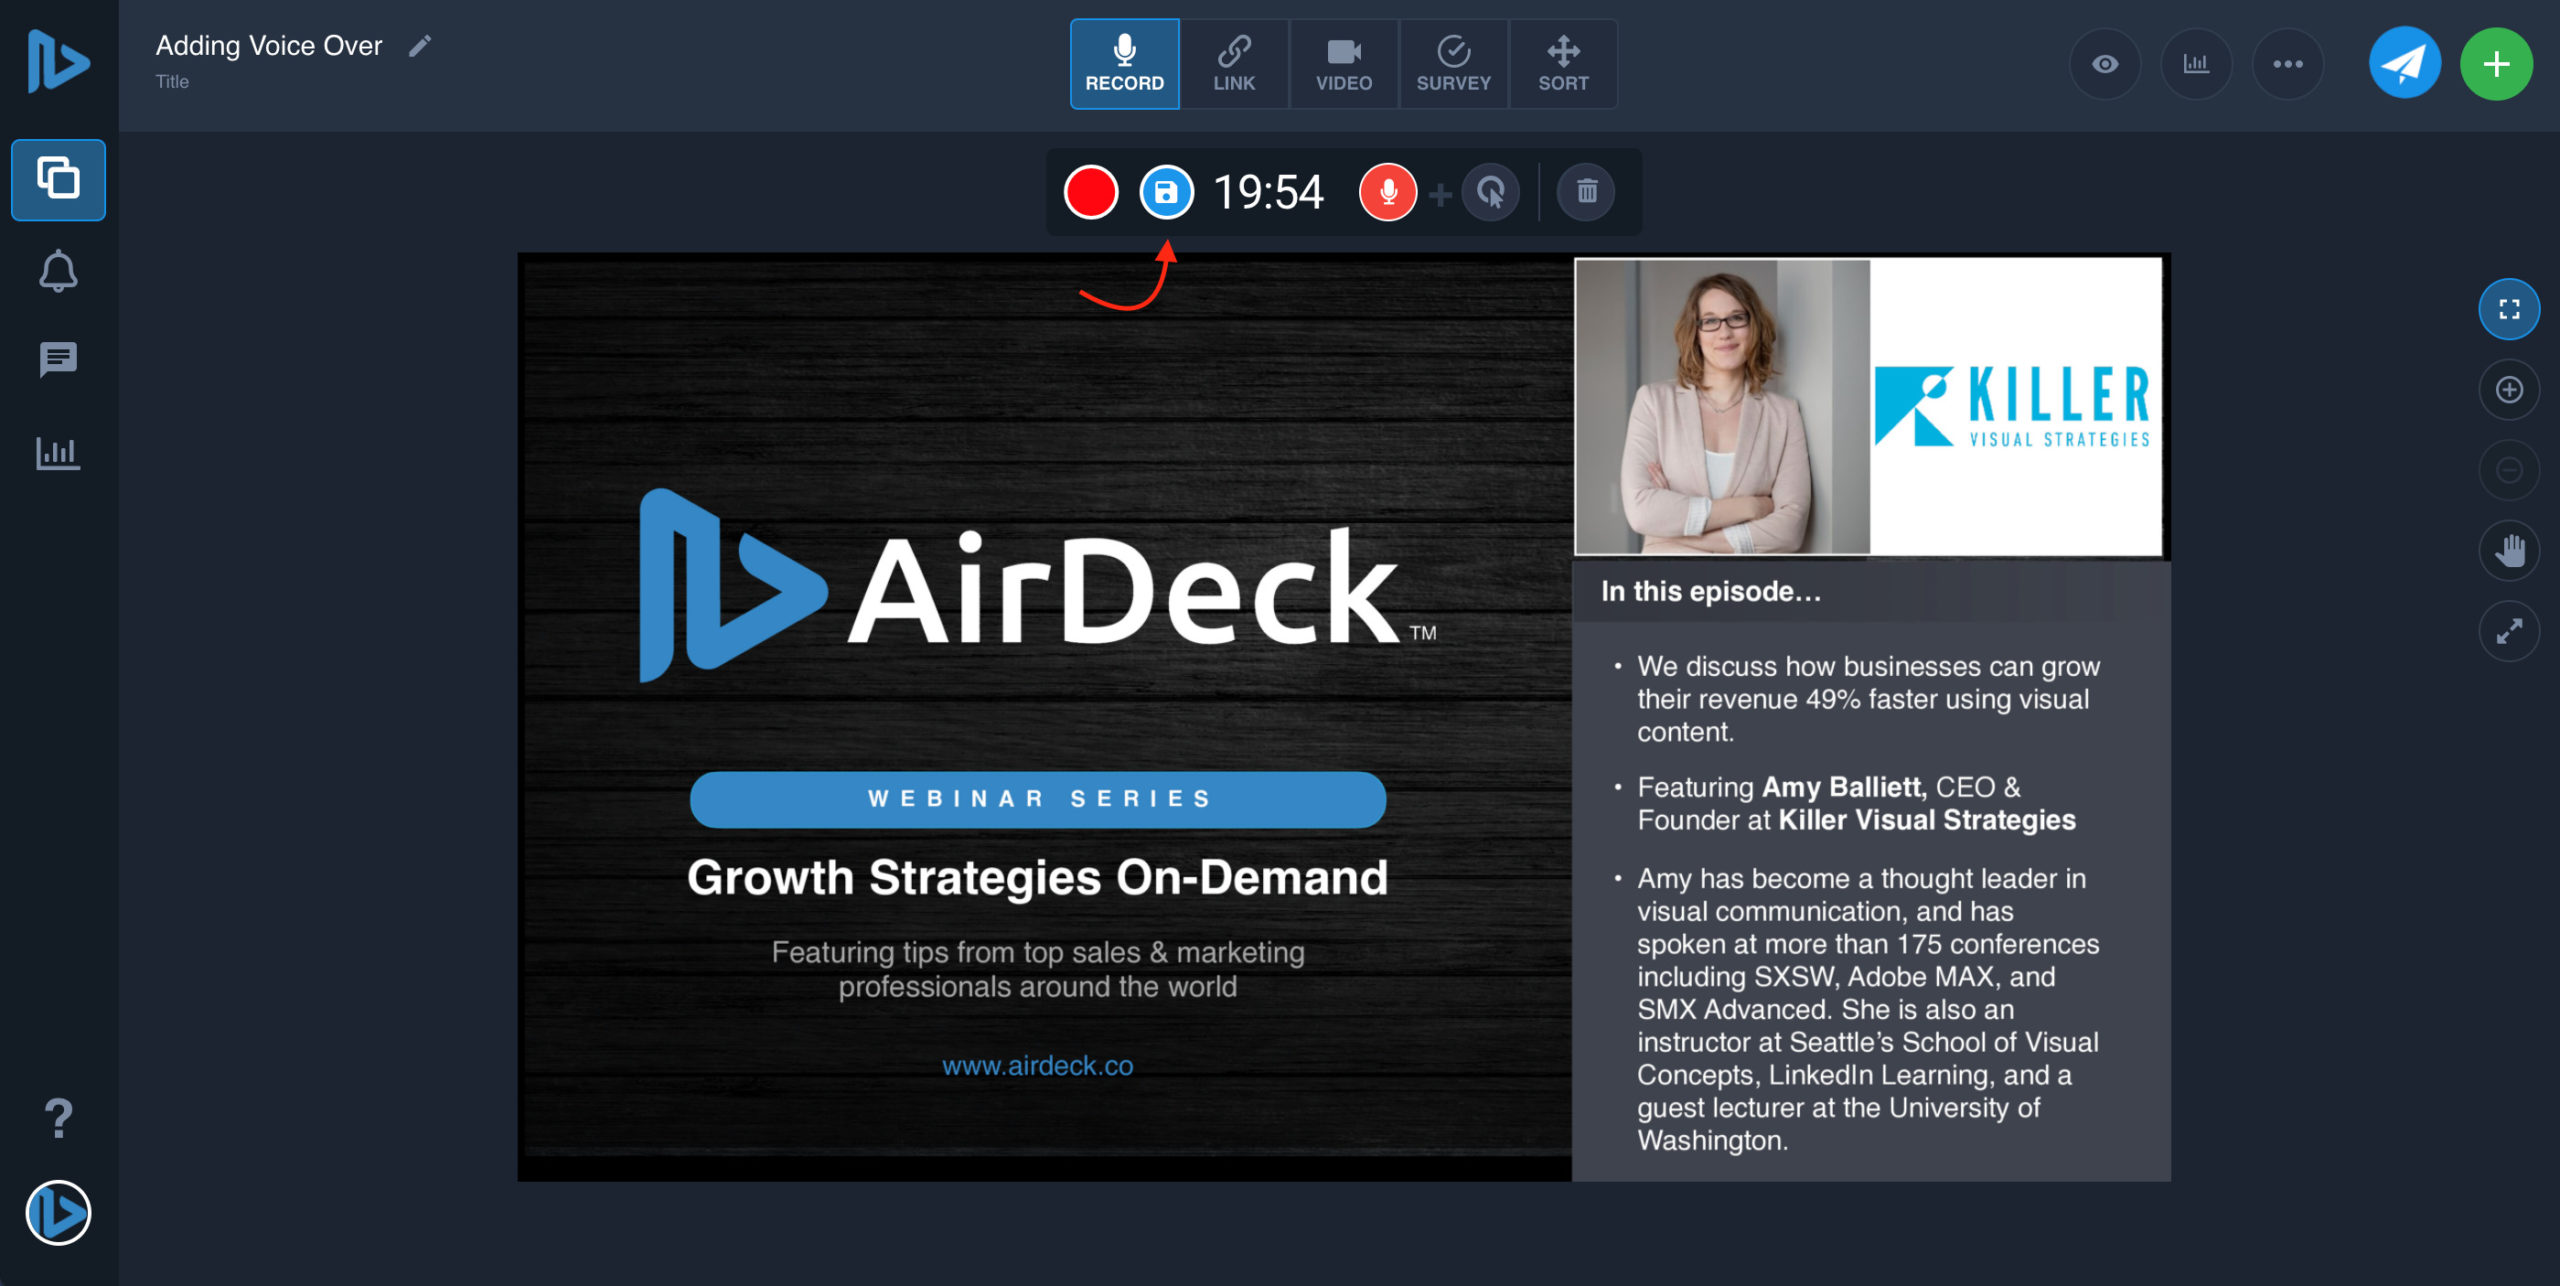
- If you wish to upload a separate audio file from an external source, hit the “upload audio” button.

- When you have finished recording, you can move on to the next slide.