


Learn how to use AirAdeck’s Slide Sorter feature with this quick step-by-step guide. Plus, get tips on how to manage and edit slides fast.
How to Use The Slide Sorter Feature
It’s crucial to keep an organized presentation to make editing easier. The fact is, it’s not so easy. Therefore, having the option to manage your presentation later comes in handy.
With AirDeck’s slide sorter tool, it’s easy to view all your slides and organize them seamlessly. Simply arrange your presentation by dragging and dropping content. You can also hide, delete, or upload new slides to edit your presentation quickly.
Not sure how to use this tool? Well, you’re in luck. Below, you will find a five-step tutorial that walks you through AirDeck’s slide sorter features and how to use them.
[irp posts=”285″ name=”Get Started with AirDeck (Easy Guide)”]
1. Log Into Your AirDeck Video Presentation
AirDeck’s Upload Slide Feature
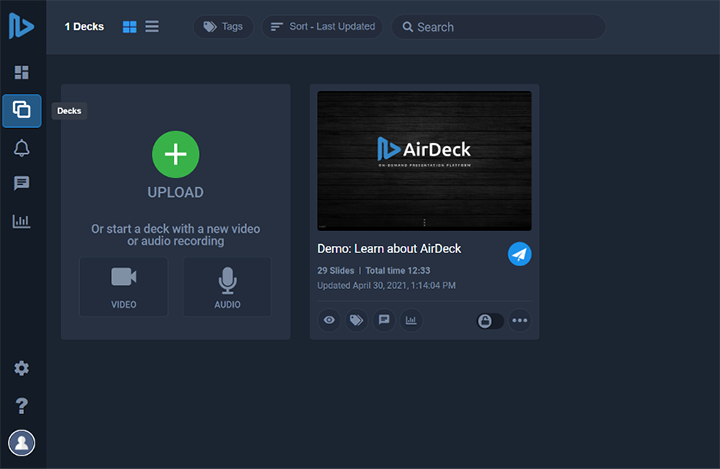
First, log into your AirDeck account to access the slide sorter features.
After you log in, you will see a panel on the left-hand side of your screen.
Click on the Decks option to access your presentation slides. You will also have the option to upload new slides or start a new presentation.
Now, click on the presentation you want to edit and sort through.
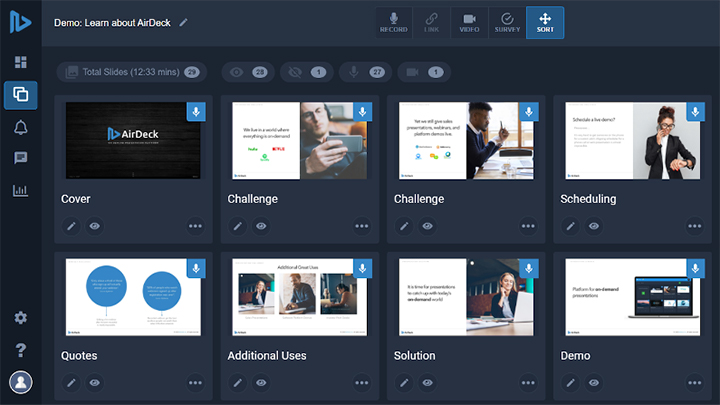
2. Choose the SORT Option to Arrange Your Slides
AirDeck’s Slide Sorter Feature
Once you have selected your presentation, you will see a panel centered at the top of your screen.
Click the SORT option furthest to the right on the panel.
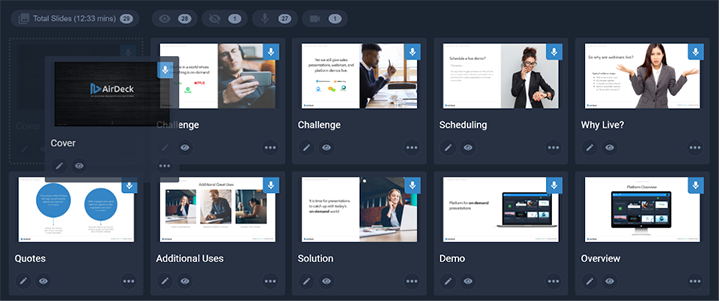
Now you should see the total number of slides you have and an overview of your deck, separated slide by slide.
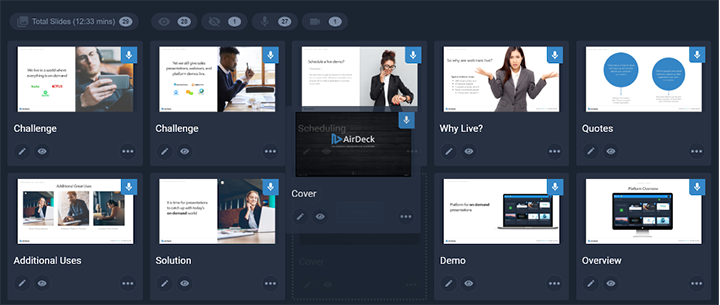
3. Drag and Drop Your Slides to Arrange Your Presentation
Select a Slide in AirDeck
To sort your slides, click on the slide you want to move, drag it to where you want, and drop it in your slide deck to rearrange the order.
After you drop the slide, you will see a message that says you have successfully reordered the slide.
Drag the Slide in AirDeck
Drop the Slide in AirDeck
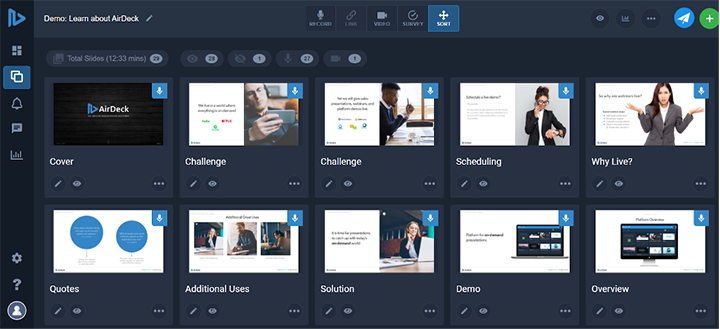
4. Using the Actions Option to Access More Editing Options
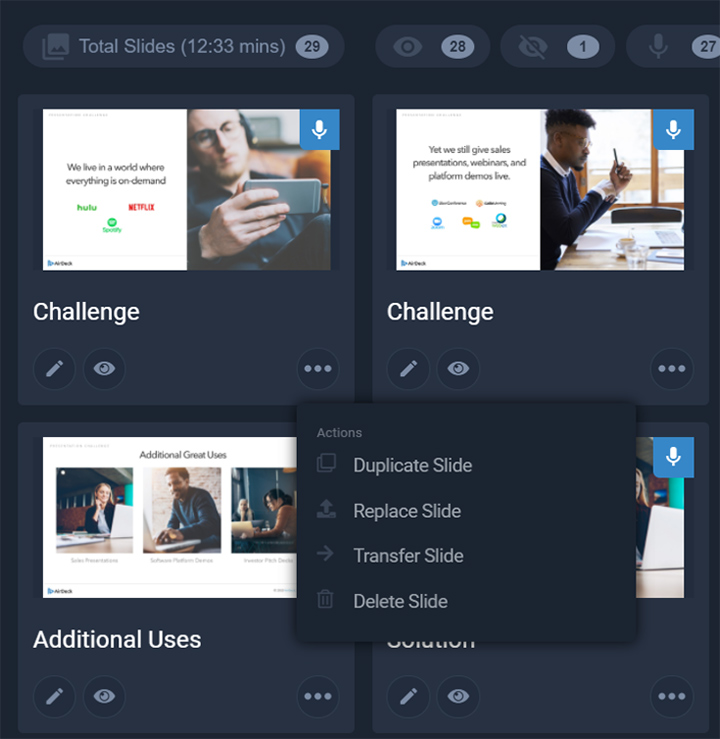
AirDeck Slide Actions Option
Click the Actions button with the three dots to duplicate or delete slides or pages.
You can also replace the slide you want to with content from local files, Google Drive, or Dropbox. Moreover, you can keep the existing audio or even transfer audio to another slide deck.
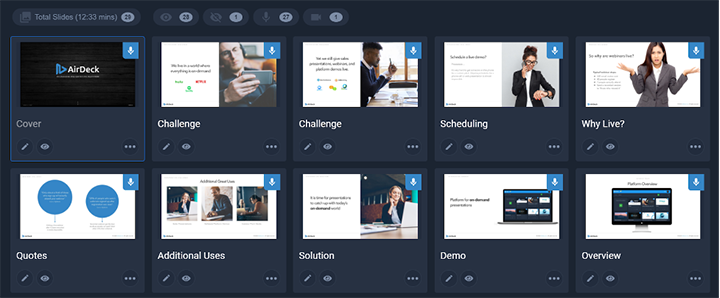
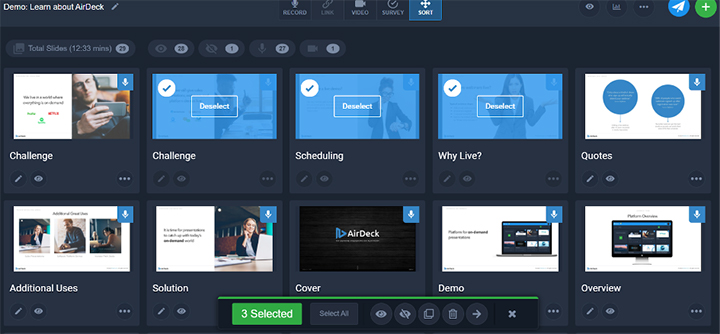
5. Select Multiple Slides to Streamline Your Workflow
Select Multiple Slides in AirDeck
You may want to complete group actions and select multiple slides at a time.
To do this, hover over the slide you want to select until you see a circle in the upper left corner of the slide.
Next, click the circle to select the slide. Repeat this for each slide you want to edit as a group.
At the bottom center of the screen, you will see a panel with six options. Choose one of the options below that best fits your needs:
- Select all slides in the deck
- Make the selected slides visible
- Hide the selected slides
- Duplicate the selected slides
- Delete the selected slides
- Transfer the selected slides
That’s it! AirDeck’s intuitive navigation and features make it easy to create professional presentations fast.
Give AirDeck a Try Today!
Haven’t checked out our latest features yet? No problem! Click the button below to try AirDeck yourself for free — no credit card required.