


Adding audio to your presentation is super simple! In this quick guide, we’ll go over both how to record audio from your browser, as well as upload existing files. AirDeck makes it easy to narrate any presentation, adding a personal touch to your slideshow. Whether you’re creating a pitch deck for possible investors or recording a board meeting, AirDeck has your back with seamless audio recording and uploading.
How to Get Started
First, make sure you have a presentation uploaded into AirDeck. If you’re not sure how to upload a presentation, check out our Get Started guide. Then, after uploading your deck, click the cover photo in your portal. You’ll be taken to the recorder screen, similar to the picture below.
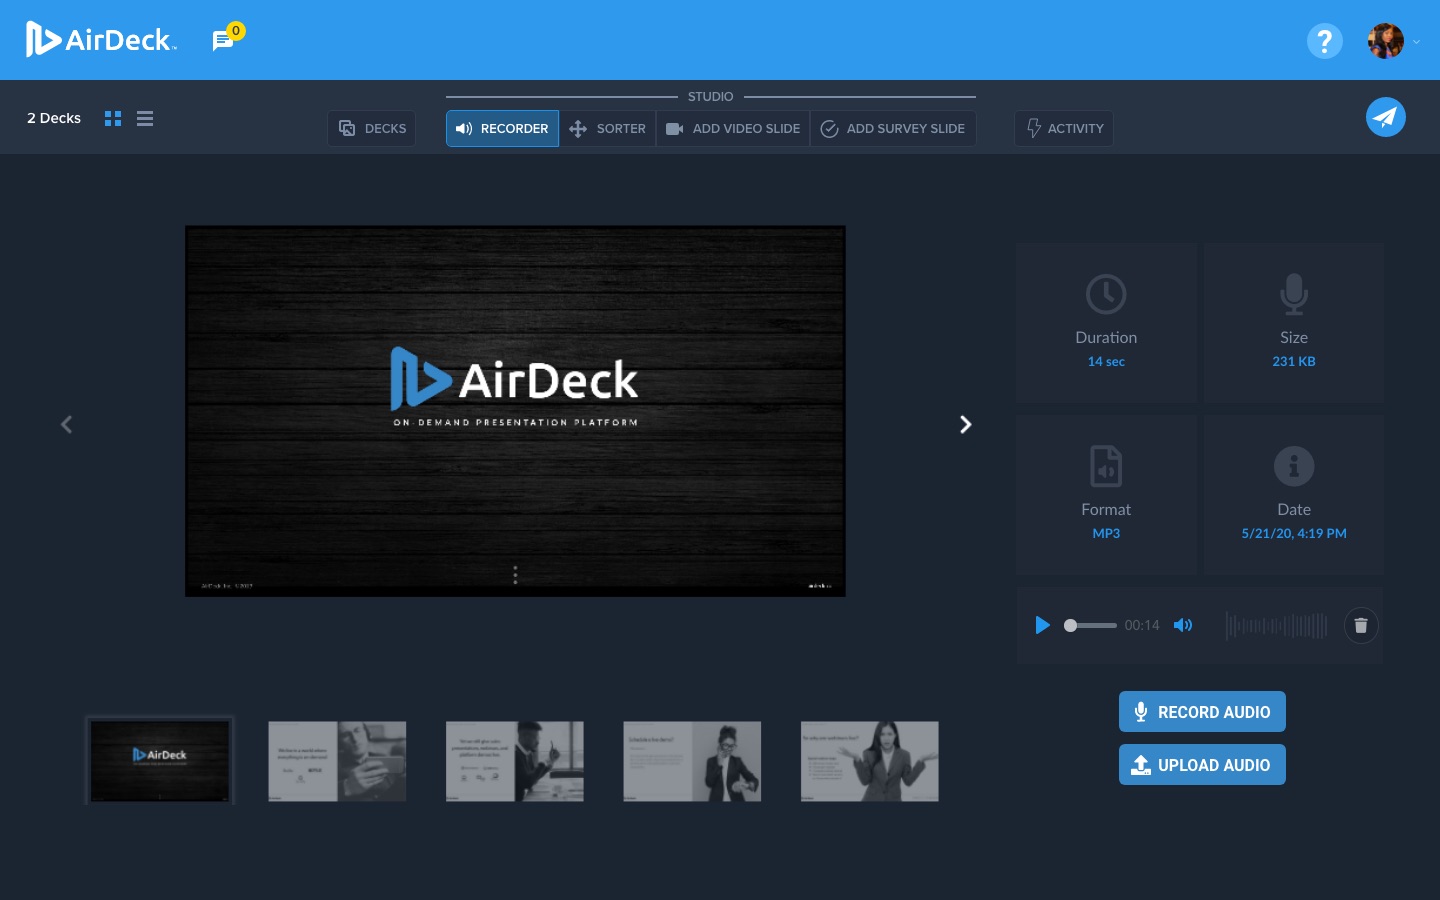
On this screen, you can select a slide by pressing the left and right arrows, or the slide preview bar. Once you’ve selected the slide you want to narrate, click “record audio”. Then, click the small red circle. After a brief countdown, start talking! AirDeck will pick up your audio right from your device’s microphone. Or, click “upload audio” to insert a prerecorded clip, sound effect, song, or another type of audio file. Each individual slide can hold up to 20 minutes of audio. With AirDeck, you record slides one by one instead of all at once. This process makes it easy to customize your message or start over if you make a mistake. Make sure to save your audio before moving on to the next slide!
For more information on creating professional content with AirDeck, check out our blog page on how to record high-quality audio.
Want to spice up your presentation by adding personalization? Here are tips from AirDeck on how to easily personalize your presentation and increase viewer interactivity.
Additionally, check out this article from Audio Journalism about the benefits of adding audio to your presentations.